
Contents
Garage Door Sensor Wire Replacement GarageDoorSalesNearme.Com | If you are looking for a quick and easy solution to replacing your garage door sensor wires, then you have come to the right place. This guide will show you how to untangle tangled wires, adjust your sensors, and install new wires.
Garage Door Sensor Wire Replacement
#Install the new wires
A garage door sensor is designed to sense the presence of an object in front of the door. If the object is a blockage, the sensor will not open the door. The sensor uses magnets to identify the obstacle.
When a garage door sensor is working properly, the door will flash red. An orange light will also occur if there is an obstruction.
This light may be caused by wires being improperly connected. It is important to check all of the wiring in the sensor system, including the control cables, to make sure everything is working correctly.
When installing a sensor, it is important to use the proper size of wire. 18-gauge wire is used for photoelectric sensors, while 22-gauge wire is required for magnetic sensors. Magnetic sensors do not function well in bright environments.
To install a new garage door sensor, ensure the lens is free of debris. If dust, grime or moisture is obstructing the sensor, clean it with a soft cloth.
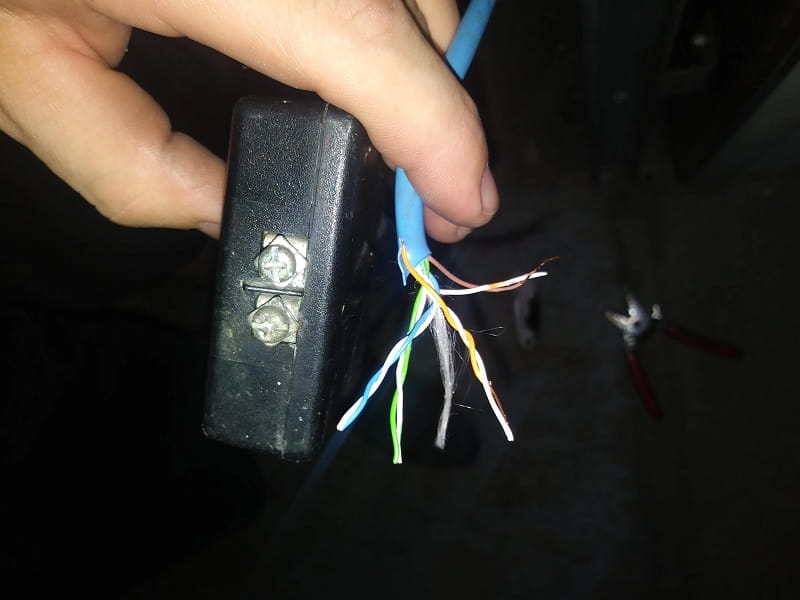
The garage door sensor has individual wires. In order to connect them, you will need to crimp a wire nut. There are also plastic wire nuts that can be used to attach them.
You will also need a tool knife. Cut the sensor’s wire about one foot from the end. Alternatively, cut the wire using a wire stripper. Be careful not to pierce the wire with a staple.
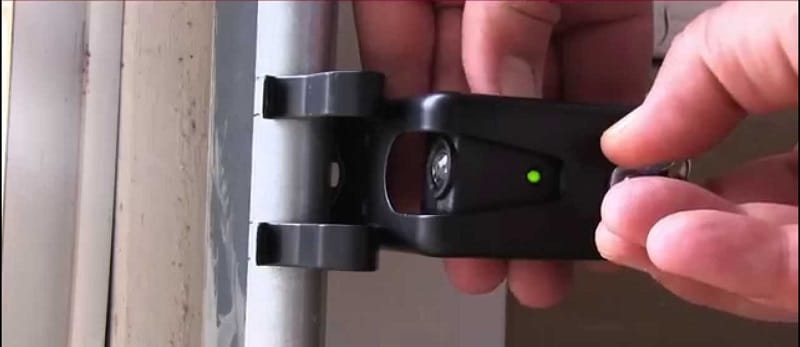
After you have attached the sensor to the wall, you will need to test it. LiftMaster says that issues with safety sensor wiring typically occur because of improper connection.
To test the sensor, you can use a cardboard box. The green light should glow uninterrupted. Otherwise, you will need to contact a professional.
Read More:
Garage Door Stuck Open – What Causes & Fixes
Automatic Garage Door Closer When You Forget
You will need a black and white wire for your new garage door sensor. These wires should be insulated. Once you have bonded the wires, you will need to secure them with insulated staples.
If you have trouble connecting the garage door sensor, you may need to replace the wires. If you are unsure about the electrical wiring in your home, it is best to hire a professional.
Garage Door Sensor Wire Replacement
#Check if the sensors are getting power
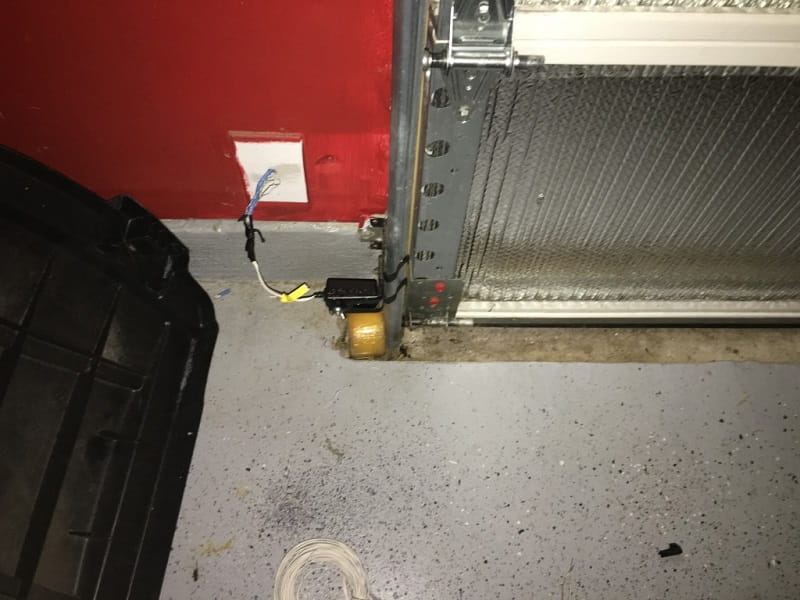
If your garage door opener is not opening or closing properly, you need to check if the sensor wires are getting power. If it’s not, you need to get to the bottom of it as soon as possible.
If the LED lights on the garage door sensor are blinking, this may be a sign that the sensors are not working correctly. The LEDs should be on and glowing steadily. This may also be a symptom of a more serious problem, such as a broken sensor or a broken bracket.
You can check if the garage door sensor wires are getting power by plugging in a cable into the unit. If this does not solve the problem, you might need to contact a professional for repair.
You should also check if the receiver lens is clean. If it’s not, you’ll need to replace it. Using a soft cloth, remove any dust from the lens.
You should also make sure that the LED on the sending sensor is steady. If not, you need to replace the wire.
While you are at it, try to clear any debris or objects that are obstructing the beams. These can block the signal, preventing the sensor from working.
Finally, you should test the logic board. It should be showing 4-5 volts dc. If it is not, the battery may be dead and it needs to be replaced.
There are other things to check before you consider replacing the sensor. A broken capacitor or a bad battery can rob you of the ability to make changes to the sensor. Similarly, the weather can affect your signal. Excessive rain or sprinklers can also cause a short circuit.
In order to get the most out of your garage door opener, you should regularly clean your sensors. Not only will this keep your doors working in top shape, but it will also prevent you from having to replace your opener.
If the garage door opener doesn’t have the om-mo-mo-mi-motice, you’re probably going to need to call a technician to fix it. Whether you need to replace a sensor or get a new logic board, a professional can help.
Garage Door Sensor Wire Replacement
#Untangle tangled wires
A tangled garage door sensor cord can be a real pain. Fortunately, there are a few nifty tricks of the trade to help you out. One such trick is the use of twist connectors to reattach your wires. Another trick is to place cardboard in front of your sensor. This can also serve as a quick reminder to reattach the cord in the first place.
As with most things, it’s best to consult a qualified professional if you’re looking to do it yourself. These guys have the expertise to diagnose your garage door’s ailments and come up with the best solutions to your problem. The best part is they’re only a phone call away. You’ll be glad you did.
For all the hype that surrounds the sensor, it’s important to remember that it’s just another piece of hardware. Its function can be compromised by a number of factors, including but not limited to the age of the batteries in your remote and the condition of your garage door.
If you’re not sure whether or not you have a broken garage door cable, there’s no reason to guess. Luckily, there are a few tricks of the trade to get you up and running again in no time at all.
While there are other lesser known ways to test the limits of your garage door, the above mentioned is the quickest and most effective route to take.
It’s also a good idea to clean your system regularly to avoid the dreaded dust bunny. Likewise, be sure to follow the manufacturer’s specifications to avoid the dreaded sensor replacement.
One of the most important functions of your garage door is the safety of your loved ones and pets. So make sure to keep these things in mind when you’re testing out the latest and greatest in garage door technology.
By using a few of these tricks of the trade, you’ll be sure to enjoy peace of mind for years to come. Lastly, if you’re having trouble selecting the right garage door opener, you’ll be happy to know that there are several high quality manufacturers out there.
Garage Door Sensor Wire Replacement
#Adjust the sensors
When the LED lights start flickering on your garage door sensors, there is a good chance that something is blocking the light beam.
The lense on the sensors might be dirty and cloudy, or there might be obstructions that are preventing the beam from getting to the receiver. To fix this problem, you need to adjust the garage door sensor wire replacement.
Adjusting the sensors is relatively easy. If you are not sure how to do it, it is a good idea to consult an electrician in your area.
First, you need to check the wiring. Check the wires for damage and check for any loose connections. They should be black and white, and they should be insulated.
Next, take a look at the brackets that the sensor mounts to. If they are busted, this will stop the beam from being able to function properly. You should also test the wiring in your breaker box to ensure it is working correctly.
If the sensors are aligned, you should be able to detect and stop the door from closing. After you have finished checking, you can tighten the screws and secure the sensors. However, you may need to adjust the screws if the beams are not lined up.
Once the sensors are secured, you should turn on your power supply. The LED lights should now glow steadily.
If you notice that the lights are not illuminating, you might need to adjust the garage door sensor wire replacement. A damaged wire can cause the sensor to fail, and the LED lights will not work.
You can also adjust the garage door sensor by sliding the mounting bracket upward. Be careful not to jostle the sensors.
Finally, you can clean the sensors with a soft cloth. Make sure to remove any dirt or dust. This can help prevent the garage door from failing.
In addition, if you notice that the beams are out of line, you can use pliers to reposition them. You can then adjust the garage door sensor wire replacement by twisting the nuts on the wires.


